Balance Bot - Stuff We Made (Axis)
In this project, we used a MotorGo Axis prototype to make a self-balancing robot. This project was actually one of the driving forces behind MotorGo. It was SO hard to make this with parts off the shelf, we got fed up and decided to make our own robot controller.
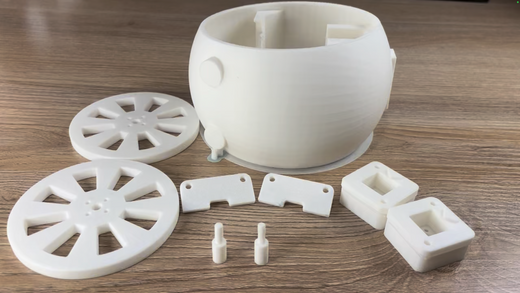
Although some of the parts are outdated, this project is 100% open source. The balance bot in the video is an older version of the one we now have available. It uses the MotorGo Mini, a precursor to the MotorGo Axis.

(MotorGo Mini)

How does it work?
Balance bots are a great way to learn dynamics, controls, sensor integration, patience... you name it. Basically, we attached an IMU to the MotorGo and told it to stand up straight.
Unstable Equilibrium
Balance bots work by holding themselves in unstable equilibrium at their natural balance point. There are a few things to keep in mind to make it work great.
- Balance point and tilt. If your robot holds itself at a non-balance point tilt, it will take more energy to hold itself still.
- Facing orientation. Because this robot has two wheels, we also needed to account for their relative positions to make sure it would hold itself facing roughly the same direction.
- Linear assumption. The basic controller we made for this assumed the control space was linear. This isn't true if the robot reaches large tilts away from its balance point.
Basically, to make this balance bot work, we needed to find a way to make it rest at its unstable, balanced equilibrium while being stable to disturbances.
IMU connection
We built this project before we had built-in IMUs on the MotorGo Axis. So we bought a popular IMU and attached it to the MotorGo GPIO, reading data over a simple I2C protocol. It took a bit of debugging to make the data less noisy and fast enough to be useful.
Controller design
There are so many ways to control a balance bot. Or at least, so many ways to try to control a balance bot :)
Our original controller was rudimentary. Take the sum of 3 controllers: tilt, steering, and damping. This worked okay, but manually choosing a balance point meant we were always wrong enough to make it want to run away a little bit.
If we went back and did this again, we'd probably derive a state-space model. This would be cool, because with a full state feedback controller, you can do more advanced controls. e.g. make the robot stand still at an angle.
Wireless control
This was the first big effort to make a good wireless PID tuning tool, which turned out great. So we'd program the robot once, connect it to our home WiFi, and then we could update PID gains and the target balance point from our laptop.

This was an amazing upgrade from having to re-upload code every time we wanted to try a new controller tuning.
What did we learn?
This project taught us a lot about product design, PID controls, and helped debug a lot of user experience challenges with the MotorGo API. We made it for our first Kickstarter, which really helped us go from R&D to "oh shoot we really have to send this to people" mode.
Sadly, we also learned how hard supply chains can be to manage. The motor we used for this project went out of circulation shortly after we designed an entire content library around it. We want to revisit this and update with current motors in our product line when we can, to make this project as easy as print, assemble, and program with our free example code.
Conclusion
This was a great way to learn PID controls, mechanical design, and how to work with I2C sensors on the MotorGo. Because it was part of a Kickstarter project, this also helped us improve the MotorGo a ton before shipping the first batch to our supporters.