Etch A Sketch Robot - Stuff We Made (Axis)
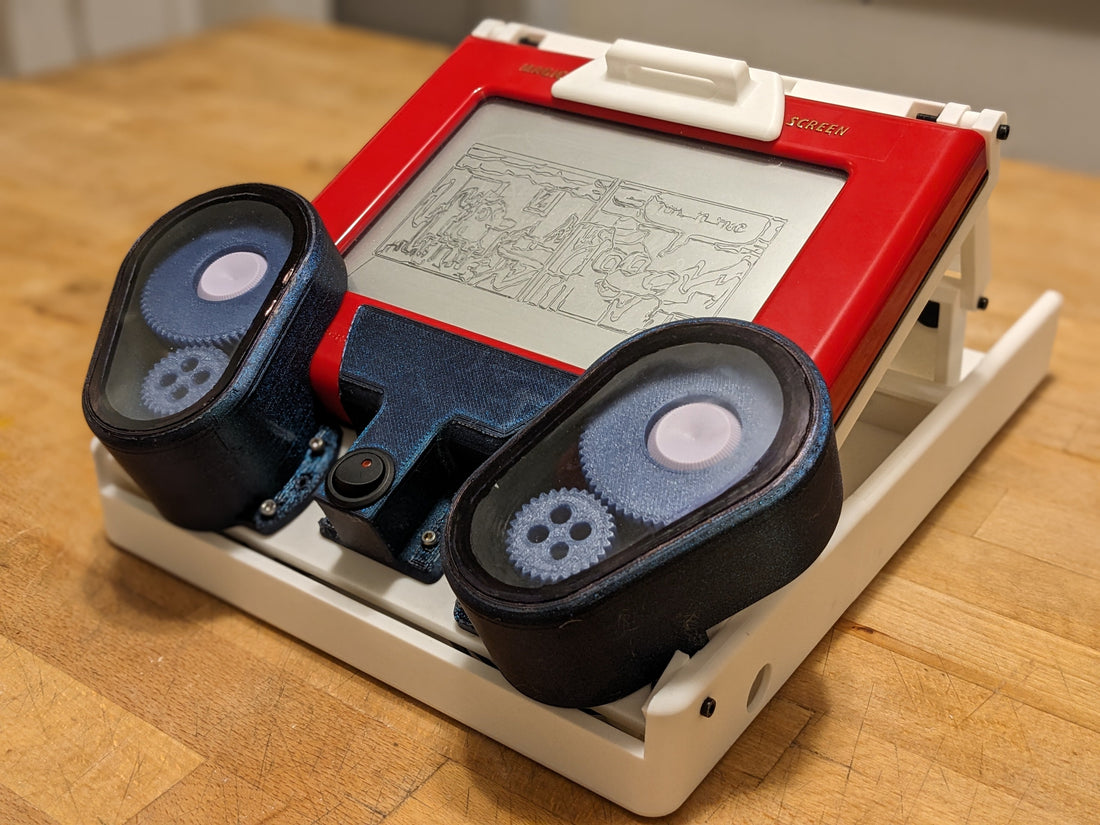
In this project, we used the MotorGo Axis to convert an Etch A Sketch into a CNC plotter. You input a picture, it creates a drawing. A MotorGo Axis handled the motion and a Raspberry Pi handled most of the computation.
This project is 100% open source.
MotorGo Axis - available on our store
How does this work?
At a very high level, we slapped drone motors onto an Etch A Sketch and made them go brr.
Motion System
We used Gartt drone motors for this project. They're pretty high-end and in a larger power class than we would normally need, but because these motors are getting less air cooling than in a drone, our main goals were 1) affordability 2) matching the Axis current limits, and 3) likelihood to do one long drawing without burning out. The most important factor, though, was probably that these motors were already in our drawer ;)
We super glued diametric magnets to the rotors on the stator-side of the shaft. Then we attached this to a block that also mounted an EncoderGo and then calibrated it in the MotorGo API. Just like that, our BLDC motors became DC servos. I know we have an incentive to tell you this, but with all the headaches this project gave us, it was really nice to never worry about the motion system once it was built.

We did have some mechanical issues though. Specifically, even as fast as the motors spun, we were only able to access ~6% of the top speed with the original gear ratio. This made it hard to control because at these speeds, the motor had nonlinear friction that stacked in weird ways with the Etch A Sketch internal friction. To fix this, see if you can spot the difference between these pictures.
MotorGo Axis - Motion Controller

With its built-in ESP32, the MotorGo Axis has decent compute power. It's not enough to run an image processing stack by itself, but in this project, we were able to implement a motion controller that could receive GCODE and translate that onto the Etch A Sketch.
We are working on a white paper and a more detailed how-to guide for how this works to contribute what we learned to the robotics community. Tuning the motion controller was a major effort for a few reasons:
- Etch A Sketch backlash - internal play in the mechanism and nonlinear friction during motor startup. Solved with mechanical/software tuning.
- Dynamic behavior at different speeds - long, straight lines and short curves needed very different controller behaviors. One of the biggest challenges because it was so dependent on choosing the right control strategy.
- Cursor drift and boundaries - cursor would drift over time between drawings, and internal mechanism would break if it hit the wall. We had to carefully re-zero the cursor into a safe part of the screen between drawings to make sure it wouldn't run into the wall and break.
- Internal mechanism slippage - we ran the motors fast enough that the internal gantry would sometimes skip or jump. Acceleration limits helped mitigate this.
Stay tuned for a white paper for more details on the motion controller design. In the meantime, you can find our codebase on Github.
Raspberry Pi - Image Processing and Path Planning
The Raspberry Pi handled the bulk of our compute overhead. Basically, here is the sequence of the image processing pipeline.
- Image upload
- Crop and resize to Etch A Sketch aspect ratio
- Remove background
- AI style transfer to cartoon
- Edge finding, convert to line drawing
- Generate GCODE from line drawing
- Remove noise from GCODE
- Optimize traveling salesman problem to minimize jumps between lines via back-tracking
The end result of the pipeline, which takes 30-90 seconds depending on the image's complexity, returns a GCODE file which is sent to the MotorGo Axis via WiFi. The Axis puts the GCODE file into its motion controller to make the motors dance.
We also built a basic website for user experience. You can add multiple robots and upload images to this server. When the sequence is started, the robot starts drawing the next image in the queue.

Conclusion
Hopefully this was as interesting for you to read as it was for us to build. We've received a few requests for how-to guides; not sure when we'll be able to get to that, but we hope what we've been able to make available so far is helpful and encouraging. Thanks for reading!